
Product demos and feature clips
Build UI mockups from elements and images, push in with shots, and let subtitles carry the narration. Easier to revise than a screen recording.
An animation workbench in your browser
DungWaaPao keeps timeline editing, voiceover, subtitles and frame-by-frame rendering on one path. You drag assets and set keyframes in the browser; the server draws every frame with the same rendering core, so the file you get is a real MP4, WebM or GIF.
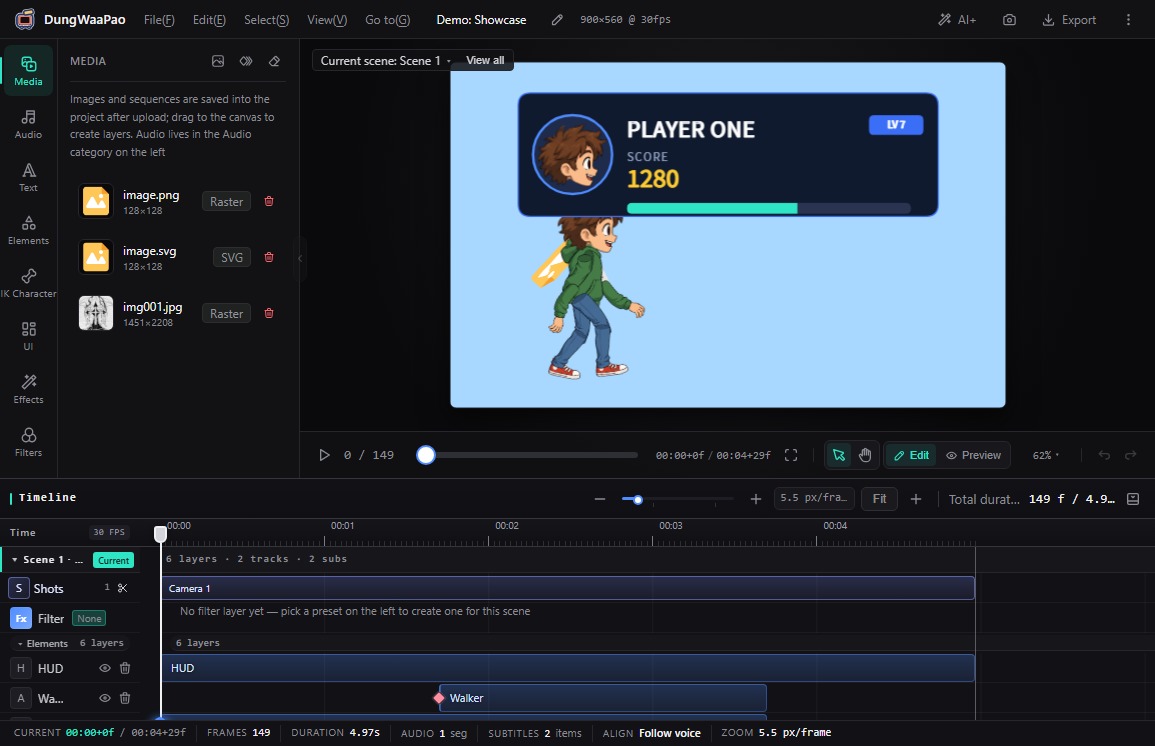
A project has one source of truth: scenes, layers, keyframes, audio and subtitles all live in it.
Editor preview and the final render call the same frame painter. It is not screen recording.
The server renders each frame and hands it to ffmpeg to mux the audio into a standard video file.
Core capabilities
Eight capabilities cover a short film from arrangement to delivery. Each works on its own, and they work together.
Keyframes, easing, trimming, splitting and ripple delete. Layers, audio and subtitles each keep their own track.
了解细节Join scenes in order and set dissolves, pushes or wipes by frame count without a separate track.
了解细节Split a scene into shots, frame each one separately, and animate position, scale and rotation with keyframes.
了解细节Blur, color and stylized effects stack per layer, with every parameter adjustable and export-accurate.
了解细节Text layers with fonts and styles; global subtitle styling with per-cue overrides and missing-glyph warnings.
了解细节Turn a script into voiceover on the audio track and generate lip-sync keyframes from the same clip.
了解细节Import OpenBone characters, switch actions, bake state-machine parameters, swap skins and sounds.
了解细节Output MP4, WebM, GIF or PNG sequences on demand, and download subtitles separately as SRT or WebVTT.
了解细节Typical use cases
Build UI mockups from elements and images, push in with shots, and let subtitles carry the narration. Easier to revise than a screen recording.
Generate voiceover from the script, derive subtitles from the same text, and drive lip sync from the clip. Rewrites stay in the text.
Switch OpenBone actions, swap skins and sounds, then export GIF or transparent WebM. One rig, many skins.
Lay out type on a fixed canvas, control pacing with keyframes, and export short loops at different sizes.
Getting started
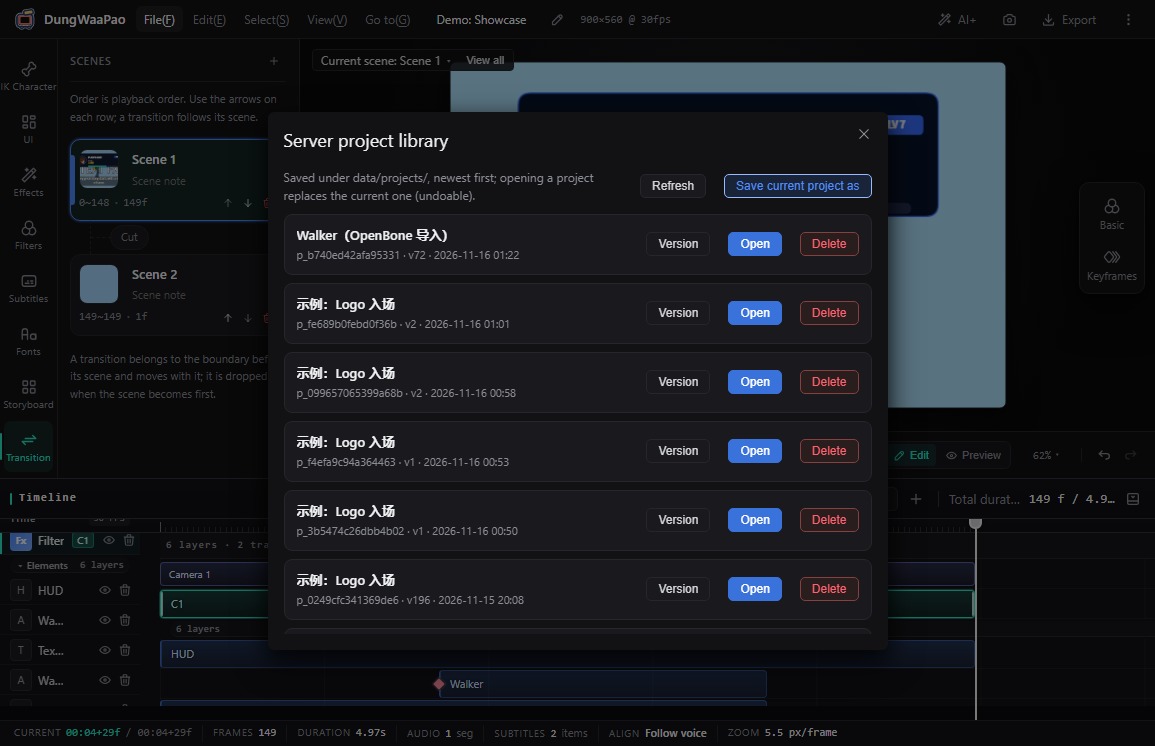
Pick one from the server project library or import a project JSON. The built-in sample is ready to edit, so you do not start from a blank file.
Drag media, elements or text onto the canvas. Change properties at the playhead; with Auto-key on, every edit drops a keyframe. With it off, click the diamond.
Use AI+ to generate voiceover and subtitles from the script. Pick a format in Export and download the file when the progress bar finishes.
All you need locally is Node.js 20+ and pnpm. Run pnpm install, then pnpm dev. The editor listens on port 9000.