
Getting started
From a working environment to your first exported file, this is the whole path.
1. Prepare the environment
| Item | Requirement |
|---|---|
| Node.js | 20 or newer |
| pnpm | 10.x, pinned by packageManager in the root package.json |
| ffmpeg | Required for video export; the bundled LGPL build has no libx264, so MP4 needs your own |
Install dependencies from the repository root. One install serves all packages:
pnpm installTo export video, also fetch the bundled ffmpeg:
pnpm ffmpeg:fetch2. Start the editor
pnpm devThis starts three processes: the editor on 9000, the render service on 9001 and the BFF on 9002. Open http://127.0.0.1:9000 for the editor. If any process exits, the orchestrator stops the others.
You can also start the editor alone, though export and other API calls need the BFF:
pnpm --filter @dwp/editor start3. Get to know the interface
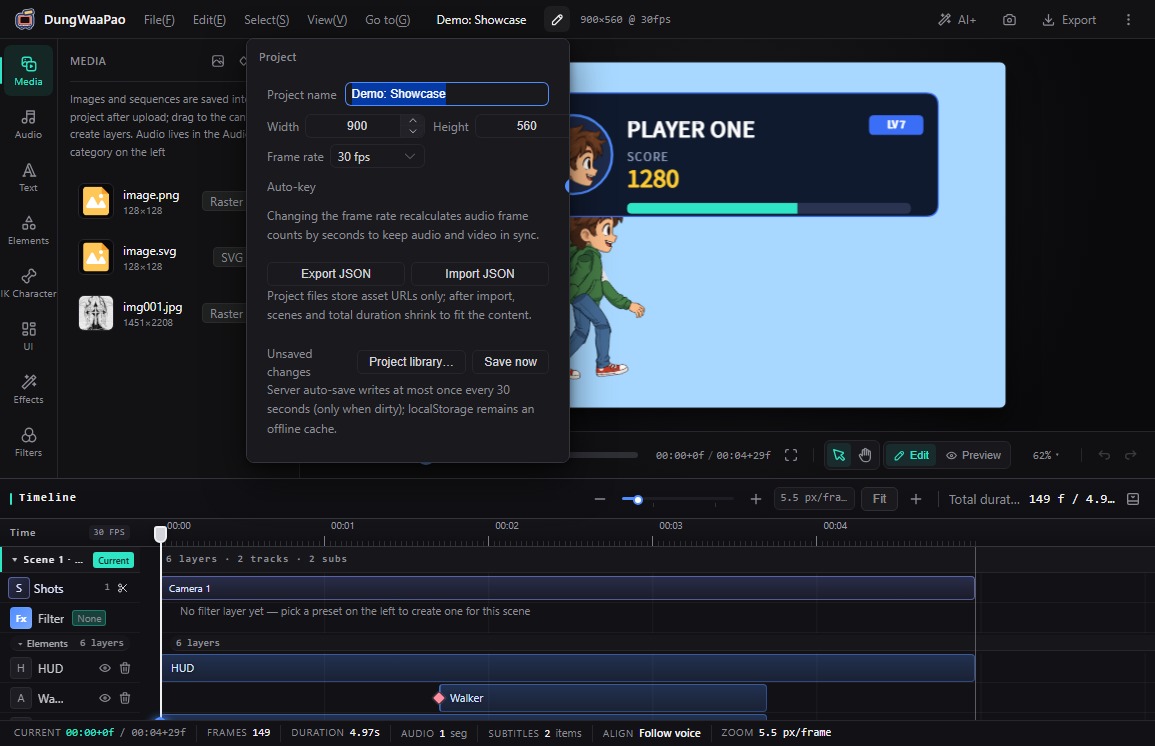
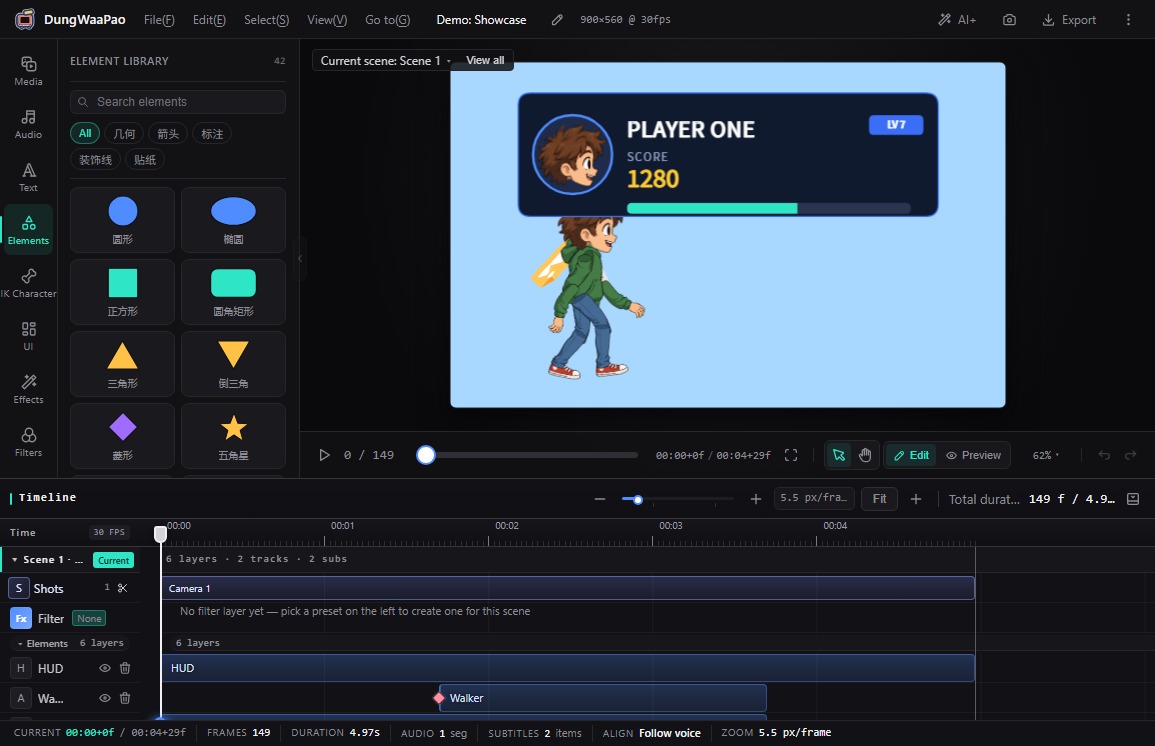
- Top bar: project name, canvas info, project settings, AI+, frame capture, Export and the menus.
- Left asset panel: twelve categories in a fixed order — Media, Audio, Text, Elements, IK Character, UI, Effects, Filters, Subtitles, Fonts, Storyboard, Transition.
- Canvas: the stage in the middle, with playback, progress, fullscreen, zoom and undo/redo below it.
- Timeline: at the bottom, grouped by scene, with rows for layers, filter, shots, shot overlays, subtitles and audio.
- Right dock: appears when something is selected, with tabs such as Properties, Keyframes, Effects, Actions, Lip sync, Voiceover and Shot.
File → New opens a blank project directly (undoable). You can also open a project from the library or import a project JSON. The built-in sample project is ready to edit.
4. Make a first animation
- Pick an asset under Media, Elements or Text and drag it onto the canvas. The layer starts at the playhead.
- Select the layer, put the playhead on the start frame, change position, scale or opacity in Properties, and click the diamond on the right of the row to set a keyframe.
- Move the playhead to the end frame and change the property again. With Auto-key on in project settings, changing a value sets the keyframe automatically.
- Drag keyframe diamonds to adjust the pacing, and press
Ctrl+Kto split a clip at the playhead. - Press space to play the preview. If the pacing is off, keep adjusting keyframes and easing.
To grade the whole frame, open Filters in the left rail and pick a preset; it creates one filter layer for the current scene. Choosing another preset only replaces it, and the red Remove current filter at the bottom removes the whole layer.
5. Voiceover and subtitles
- Click the AI button in the Audio panel header (or AI+ → AI voiceover (TTS) in the top bar), enter the script in the voiceover panel and generate voiceover. The audio lands on the current scene's default audio track.
- Select that audio clip. The dock gains a Voiceover tab where you can edit the script and voice and regenerate, or click Generate subtitles to split and align cues.
- Adjust the shared size, position, stroke and safe area under Subtitles on the left rail. Override individual cues in the dock.
- If a character needs lip sync, select the character layer, choose the same clip in Lip sync, enter the script and click Generate lip sync. The mouth set always has 10 cells, and resting or closed poses use M.
6. Export
- Click Export in the top bar and choose MP4, WebM, GIF or PNG sequence.
- Confirm resolution and frame rate, then fill in the options for that format.
- Click export. When the progress bar finishes, preview and download the file.
- To get subtitles on their own, download SRT or WebVTT from the lower part of the panel.
Shortcuts
| Action | Shortcut |
|---|---|
| Undo / redo | Ctrl+Z / Ctrl+Shift+Z |
| Split at playhead | Ctrl+K |
| Copy / paste clip | Ctrl+C / Ctrl+V |
| Delete / ripple delete | Delete / Shift+Delete |
| Timeline zoom | Ctrl+wheel, Ctrl+= / Ctrl+- |
| Fit window / fit selection | Shift+Z / Z |
| Fit canvas view | Shift+F |
| Open shortcut help | Shift+/ |
Troubleshooting
The page reports /api/... 502. The BFF is not running or the ports do not match. Check the [bff] startup line in the pnpm dev output, or open http://127.0.0.1:9002/api/health.
Export says no usable ffmpeg was found. Run pnpm ffmpeg:fetch first, or point FFMPEG_PATH / FFMPEG_DIR at a local build.
MP4 is disabled. The bundled LGPL build has no libx264. Use WebM, or provide a local ffmpeg with libx264 for MP4.
Shortcuts do nothing. Inputs, text areas, open dropdowns and dialogs swallow shortcuts. Click an empty part of the canvas and try again.
Next: browse Typical use cases, or go through Core capabilities one by one.