
Skeletal animation
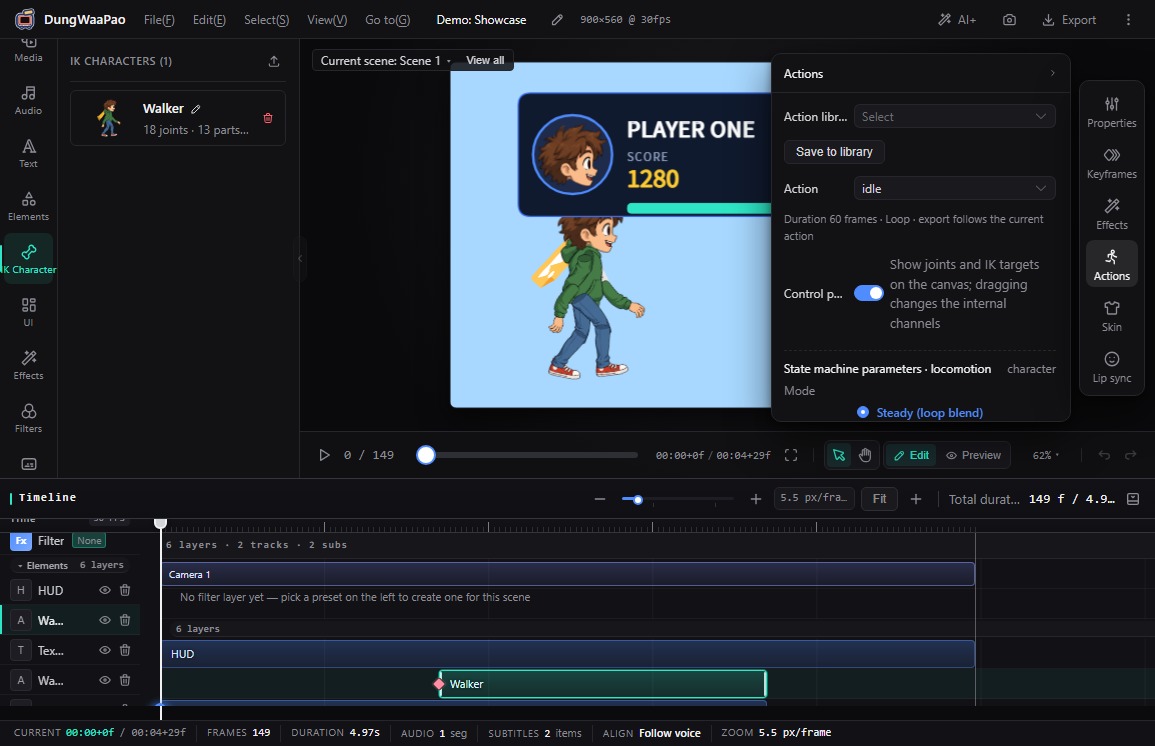
Characters come from JSON files exported by OpenBone. Once imported, a character is a normal layer: outer transforms and keyframes work as usual, while the rig itself is driven from the Actions panel.
What it does
- Import a character: the import button in the IK Character panel header opens a dropdown. Pick a JSON file and the dialog summarizes canvas size, bone count, part slots, actions and audio before you choose what to import.
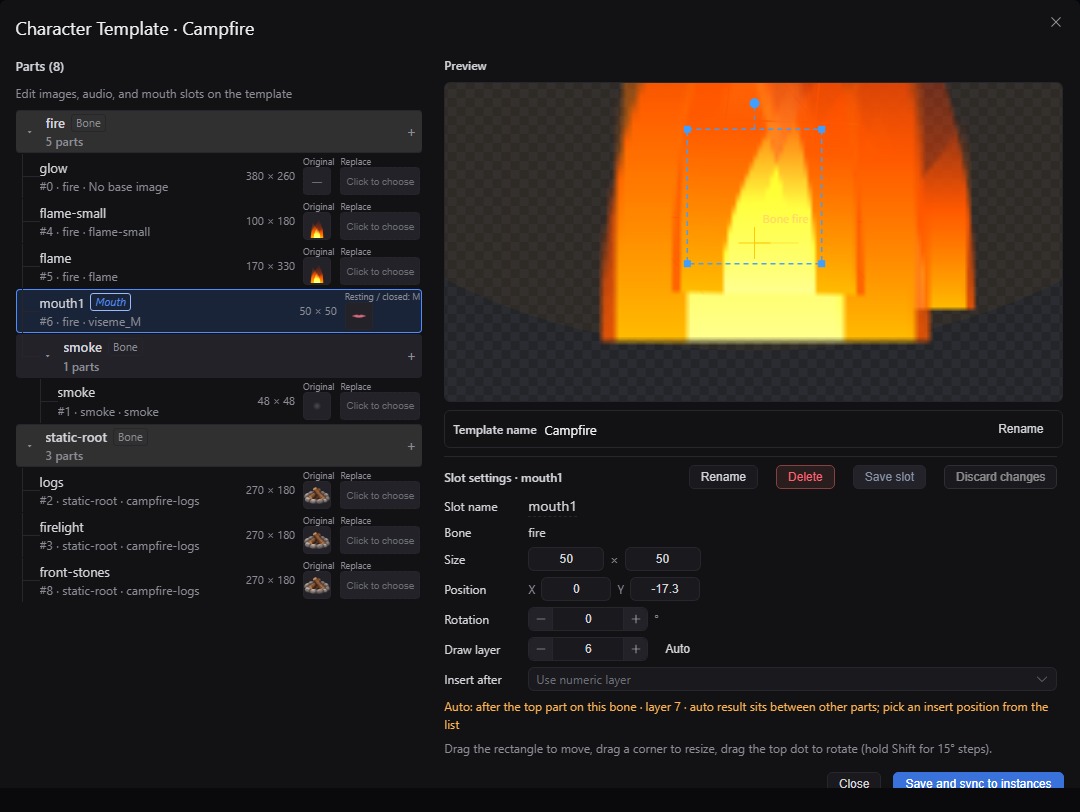
- Character library and templates: imported characters join the library and can be dragged onto the canvas. The pencil on a character card opens the Character Template editor for textures, sounds and mouth slots.
- Switch actions: select the character layer and open Actions in the dock to choose an action and see its duration and loop behavior.
- Control points and IK: turn on Control points to show joints and IK targets on the canvas; drag them to change internal channels.
- Bake state-machine parameters: moving a parameter slider does not change the frame. Click Generate action to bake the pose into action keyframes, either overwriting the current action or saving a new one.
- Skins: switch a whole skin, or override individual slots for this instance. Overrides win over the skin.
- Sound slots: replace, preview, restore or mute the character's sound slots per instance.
How to use
- In IK Character, click the import button in the header and choose an OpenBone file. Pick the parts, actions and audio you need, then confirm.
- Drag the character onto the canvas to create a character layer. Use Properties in the dock for outer position, scale, rotation and opacity.
- Open Actions, choose an action and turn on Control points to fine-tune the pose.
- To bake parameters, adjust the state-machine sliders, select Overwrite current action or Save as new action, then click Generate action.
- Open Skin to switch the whole skin or replace individual slot textures. The lower half of the same panel handles sound slots.
- To edit the template itself, click the pencil on the character card. The editor uses a 4:6 two-column layout: the part tree on the left, preview and slot settings on the right, and a fixed 10-cell mouth set. Save the template only, or sync it to instances already placed.
Outer and inner transforms stay separate
The layer's time window, position and scale are outer transforms; they do not break the rig's internal animation. Switching skins only changes textures and leaves keyframes untouched.
Templates and instances stay separate
Template changes only affect characters dragged in later. To update existing instances, choose Save and sync to instances when saving. Switching the mouth slot or closing with unsaved slot edits asks for confirmation first.
Boundaries
- Skins are filtered by bone ID. When the bone structure does not match, the dropdown shows a bone mismatch warning.
- State-machine parameters are imported read-only. They are inputs for Generate action, not a way to edit the character definition.
- Skins at different resolutions are stretched into the original slots; parts are not automatically rearranged.
- Slot names in the template editor are inline inputs committed on Enter or blur. Existing image items are not selectable yet; only mouth items can be edited.
For dialogue, see AI voiceover & lip sync.